Wednesday, July 20, 2011

Caramel Popcorn and Movie Marathon, my answer to varicose problems.


After more than a week of stress filled shifts with me being on my feet most of the time, I finally got a few days off. A much deserved and revered break for my dilated and growing leg veins. My almost smoking heels need cooling off and a day on the couch with legs raised up is just the way to do it. Coach potato for a day and proud of it!


Me,  35 err  20 no  17 I mean 10   ok 3 years from now.Thanks Ren Ren for reminding me!You seemed to forget foot calluses from hours and hours of walking .

Now, a movie marathon is a good excuse to do...nothing. And when somebody says ''movie'', naturally popcorn echoes back in answer . But since I have all the time in the world...again,  I'm not settling in for a mere microwave popped corns. I'm thinking about something more calorie laden than that. Let's talk about butter and sugar and nuts and things that aren't good for you when taken in excess but we love anyway. So let have some  of it now, shall we?

Step 1. Make the pop corn


Yeeeees that's butter with capital letter B and we are having enough of it in this recipe. Fill your pan/pot with 2 tablespoon of butter  and a bit of oil . Add in about 300 g of popcorn kernels. Do it in batches if you are using a narrow pan. Just make sure each kernel touches the bottom of the pan. Cover but not seal completely to allow moisture to excape. Ok, am I explaining too much? I guess anybody who can tie his shoelace knows how to make some popcorns!( What am I thinking? Excuse me as I burry myself in it....)Transfer popcorn in a big mixing bowl when you survive this  step.


Step 2. Make the caramel sauce

Heat  250 g of butter in a saucepan and add in 400 g of brown sugar and 125 ml corn  syrup until bubbly, stirring constantly. Let the fat and sugar bubble merrily for 5 minutes without stirring. Add in 1 teaspoon of vanilla paste. Take out from the heat and add in 1 teaspoon of baking soda. Be careful, the soda causes caramel to double its volume and become vigorously foamy. That's blisters and burns waiting to happen.


Step 3: Combine everything


Stir 1 can of salted toasted peanuts ( optional and you can use other toasted nuts too). Pour  caramel over the popped corns and toss everything using a rubber spatula or wooden spoon until popped corns  are well coated with that gooey caramel goodness. Line baking pans with baking paper or aluminium foil. Tranfer caramel popcorns into it and:


Spread.....


Spread....
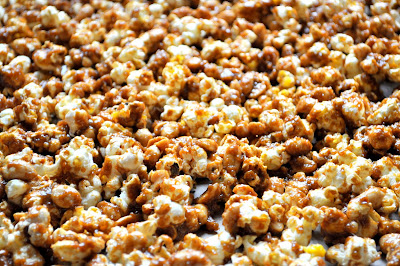


And spread some more. Bake popcorns at 120 °c for one hour , stirring every 15 minutes.
Take out from the heat. Hold back for a while and let it cool off for a couple of minutes and break apart into clusters. Store in an air tight container. It could stay crunchy for up to 10 days.....or not. By the time I'm done with Ip Man 1, the popcorn bucket was already half empty.


Donnie Yen's  furious fist was almost a blur, his lightning speed  is astonishing. Our living room was filled with the sound of his punches..

Donnie Yen: Kachaaa! Chatachaktaktaktak chakchak chak!
Me: Crunch! Crunch! Crunch! Crunch! Crunch! Crrrunch!

We are now officially an item......I mean the popcorn and I.


My preciouuuuuuuuuusssss!

Wednesday, July 13, 2011

Tuna Lasagne


A recipe that would certainly make Garfield happy. It's cheap, it's easy and it's delicious . You need no paw to like this too. Just make sure you cook enough of  to avoid any cat fight at the table.Okeeey I'm overreacting, too much tomatoes and tuna flake are invading my system right now, it simply has to get out. So grab your pans cause we're making some yummy lasagne!


Tunalicious Lasagne ala Emily

Step 1: Make the Tuna and Tomato sauce


Put 4 tablespoon of olive oil in a pan, heat under medium heat. Add in medium size chopped onion, sautee until translucent. Add in 2 cloves of crushed garlic and cook until aromatic. If I were Italian, I bet I will be hearing ''Mio Dio! or  Mama Mia'' and get pitted olives throwns at me for using canned or packed tomatoes in a pasta dish. But then, I like to make things easy so instead of having fresh tomatoes , I  settled for a mass produced chopped tomatoes----in a pack. Practical and efficient. Add in 2 packs ( about 400 g each) of chopped tomatoes into the sauteed onion and garlic. Stir in a handful of chopped oregano, thymes, basil and throw in 2 bay leaves. Add a tablespoon of white sugar and season well with salt in pepper. Stir in 3 cans of tuna in oil (drained) and take the sauce out from the heat.

Step 2: Make the Bechamel sauce


Bechamel sauce is a white sauce used in many French cuisine  as well as  in some Italian dishes such as lasagne. To make this basic white sauce, you need to make a roux. A what? A roux doesn't have fangs , breathe fire or walk on 8 legs, sidewards.It is  a cooked mixture of flour and fat ,usually butter. The thickness of this  sauce depends on the ratio of flour and butter.  Roux is traditionally equal parts of butter and flour but you can add more butter if you want your sauce to have a richer flavour. Under medium heat, heat 80 g of butter until melted, add in 50 g of flour and stir well. The roux will be rendering a freshly baked bread aroma after a minute or two. Add in 750 ml of warm milk while stirring constantly. The sauce thickens as it cooks. Season well with salt and pepper, add in about 50 g of grated parmesan cheese and take it out from the heat.


Step 3: Assemble the Lasagne


Spoon enough tuna sauce to cover the bottom of you casserole dish or baking pan. Cover the tuna sauce with lasagne sheets.  Some lasagne requires precooking. The one I used however don't have to be preboiled. Spread some bechamel sauce over the lasagne and cover it with thinly sliced mozzarella. I used about 4 mozarella balls in this recipe. You can use shredded melty cheese as well. Repeat this process until all the ingredients are used up. The last layer has to be the bechamel sauce. It will crisp up as it bakes. Sprinkle  50 g of shredded parmesan cheese. Bake lasagne at 180 °c for about 35 to 40 minutes or until the bechamel sauce turns golden brown and bubbly at the edges.


Serve pipping hot with green salad ( I know! I know!) and crusty garlic bread.
.
.
.
.
.
.
.
.
.
.
.
.
.

Come to mama!

Tuesday, July 5, 2011

Chocolate Chip Bundt Cake


Another delicious and easy to make cake that pairs wonderfully well with morning coffee or afternoon tea. I might not be a fan of drinking both but it did not stop me from enjoying this cake. This ring shaped cake with distinctive ridges is typically  German. In some parts of Germany as well as Austria, such cakes are often called Gugelhupf from the German word Kugel (which means globe or ball) and Hupf (action word which means to hop) and is a reference to the cake surface going up while being baked. This is cake is versatile and there are many different recipes out there , from chocolate based, nut and alcohol based to more  refreshing and fruity versions. Here's just one of them.


Butter a bundt cake pan well, sprinkle with breadcrumbs to avoid cake from sticking when baked.
In mixing bowl, cream 250 g of softened butter and  250 g sugar until pale and thick. Beat in 6 eggs one at a time until sugar is thoroughly dissolved.


Mix 500 g of flour ,2 tablespoon of baking powder and a pinch of salt together. Sieve half of the flour mixture over the butter and egg mixture. Add in about 4 tablespoon of milk and fold everything together using a rubber spatula. Repeat until all the flour is used up and add spoonfuls of milk if cake batter is too dry.Do not overbeat. Add extra flavor booster. I added a spoonful of rum. You can use Bourbon or liqueur of your preference or you could also completely omit the spirits .Add in a cup of chocolate chips or  chopped pecan nuts or candied fruit if you want. Transfer batter into the bundt pan .


Bake cake at a preheated oven  at 180°c for 50 to 60 minutes until cake is done. ( To test it, insert a toothpick into the cake and if it comes out clean, then it is ready.) Take the cake out from the oven, let it cool in the pan  for about 10  mintues and invert the cake carefully into a rack. It could be serve at it is but it would taste even better if glazed. I used vanilla flavoured glaze which i poped into the microwave for 2 minutes until it reached a spreadable consistency.


Related Posts Plugin for WordPress, Blogger...